Tools V1–V4
🛠️ Tool-Specific Feature Guide
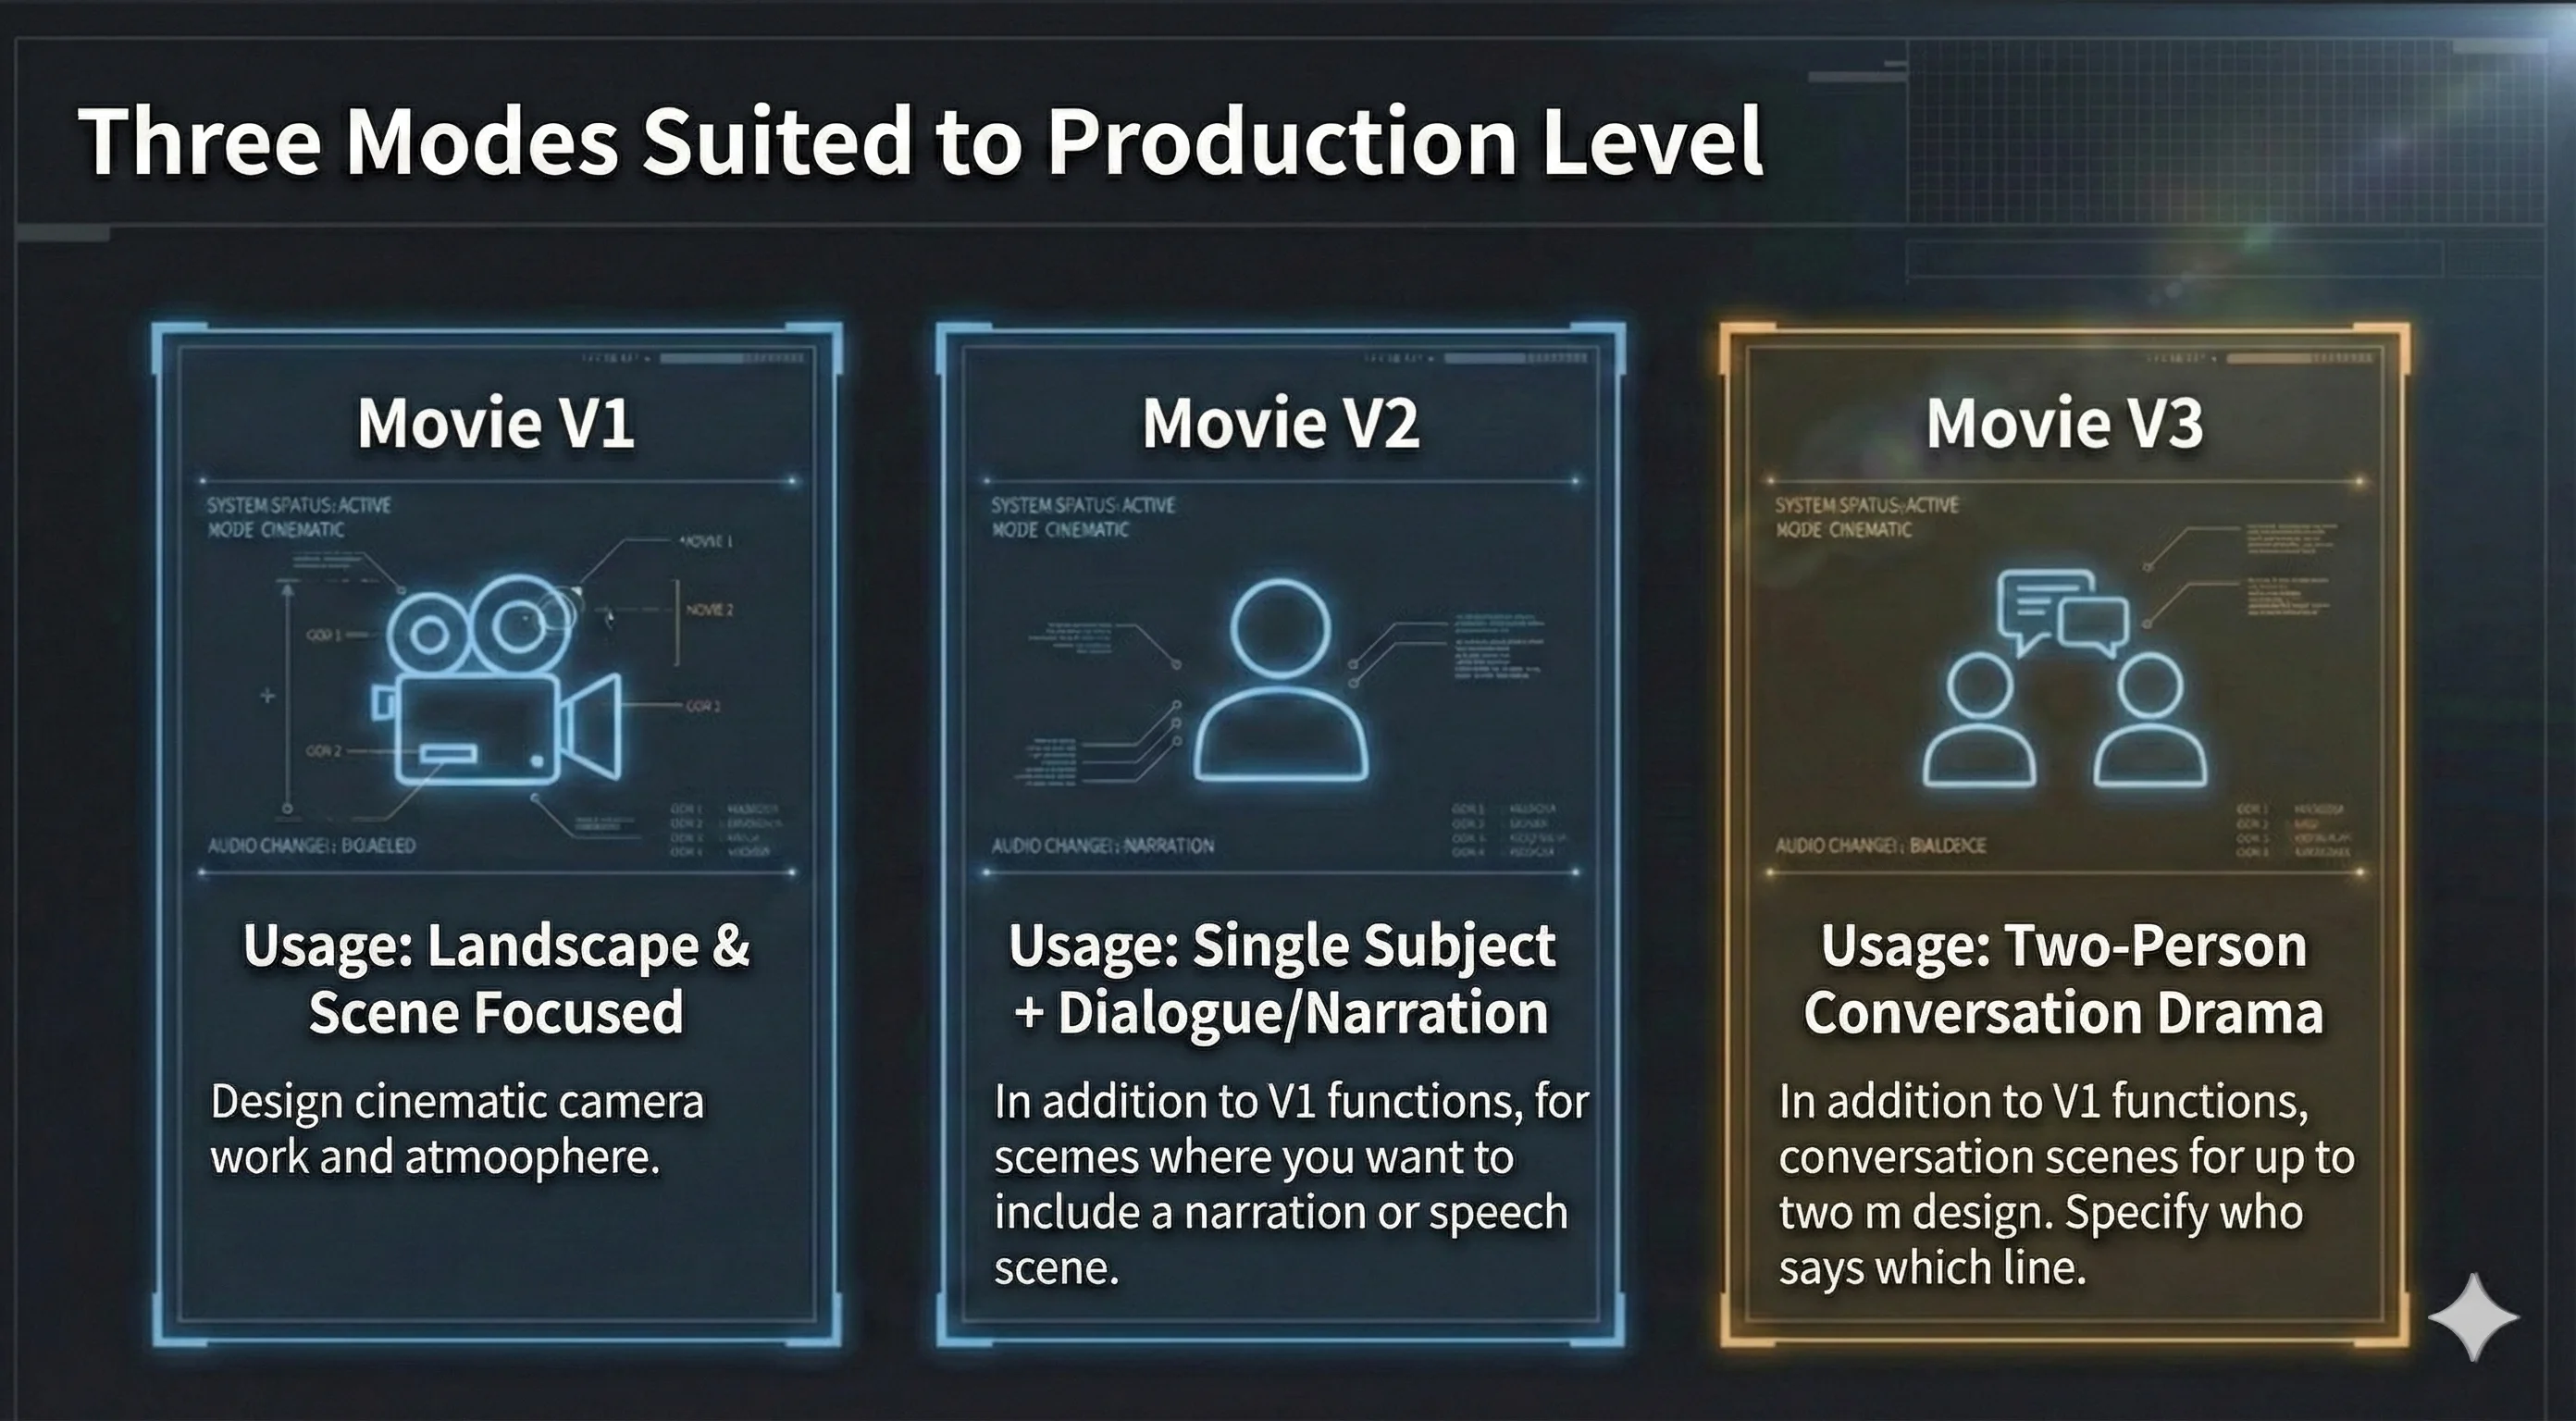
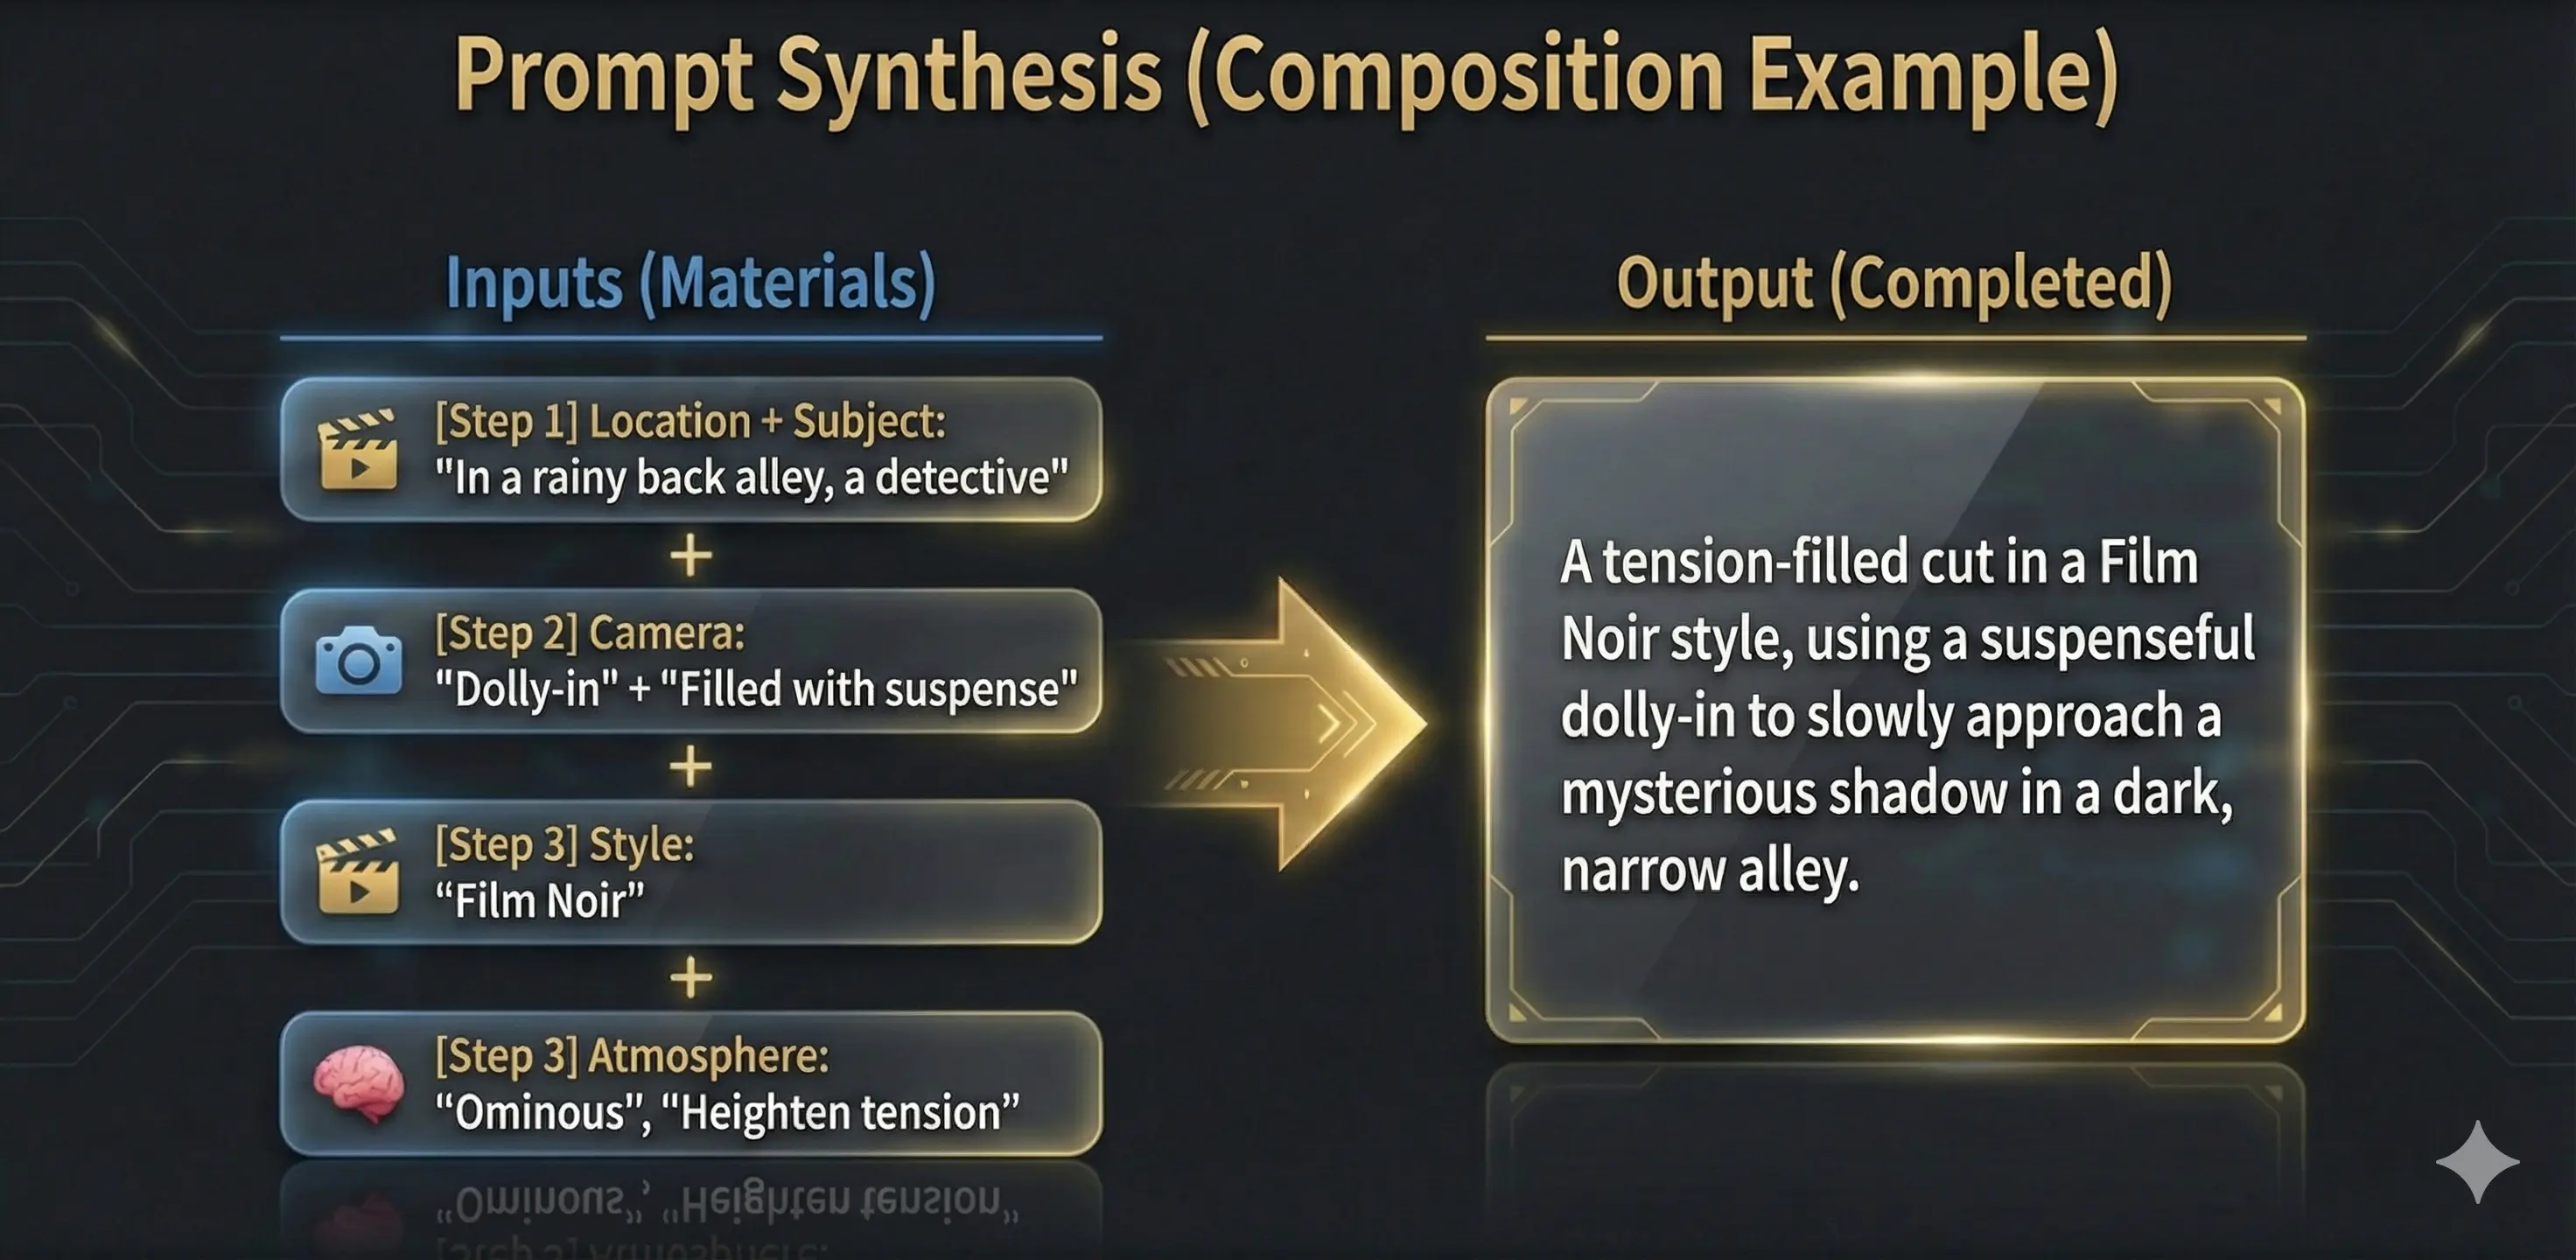
movie v1 🎦
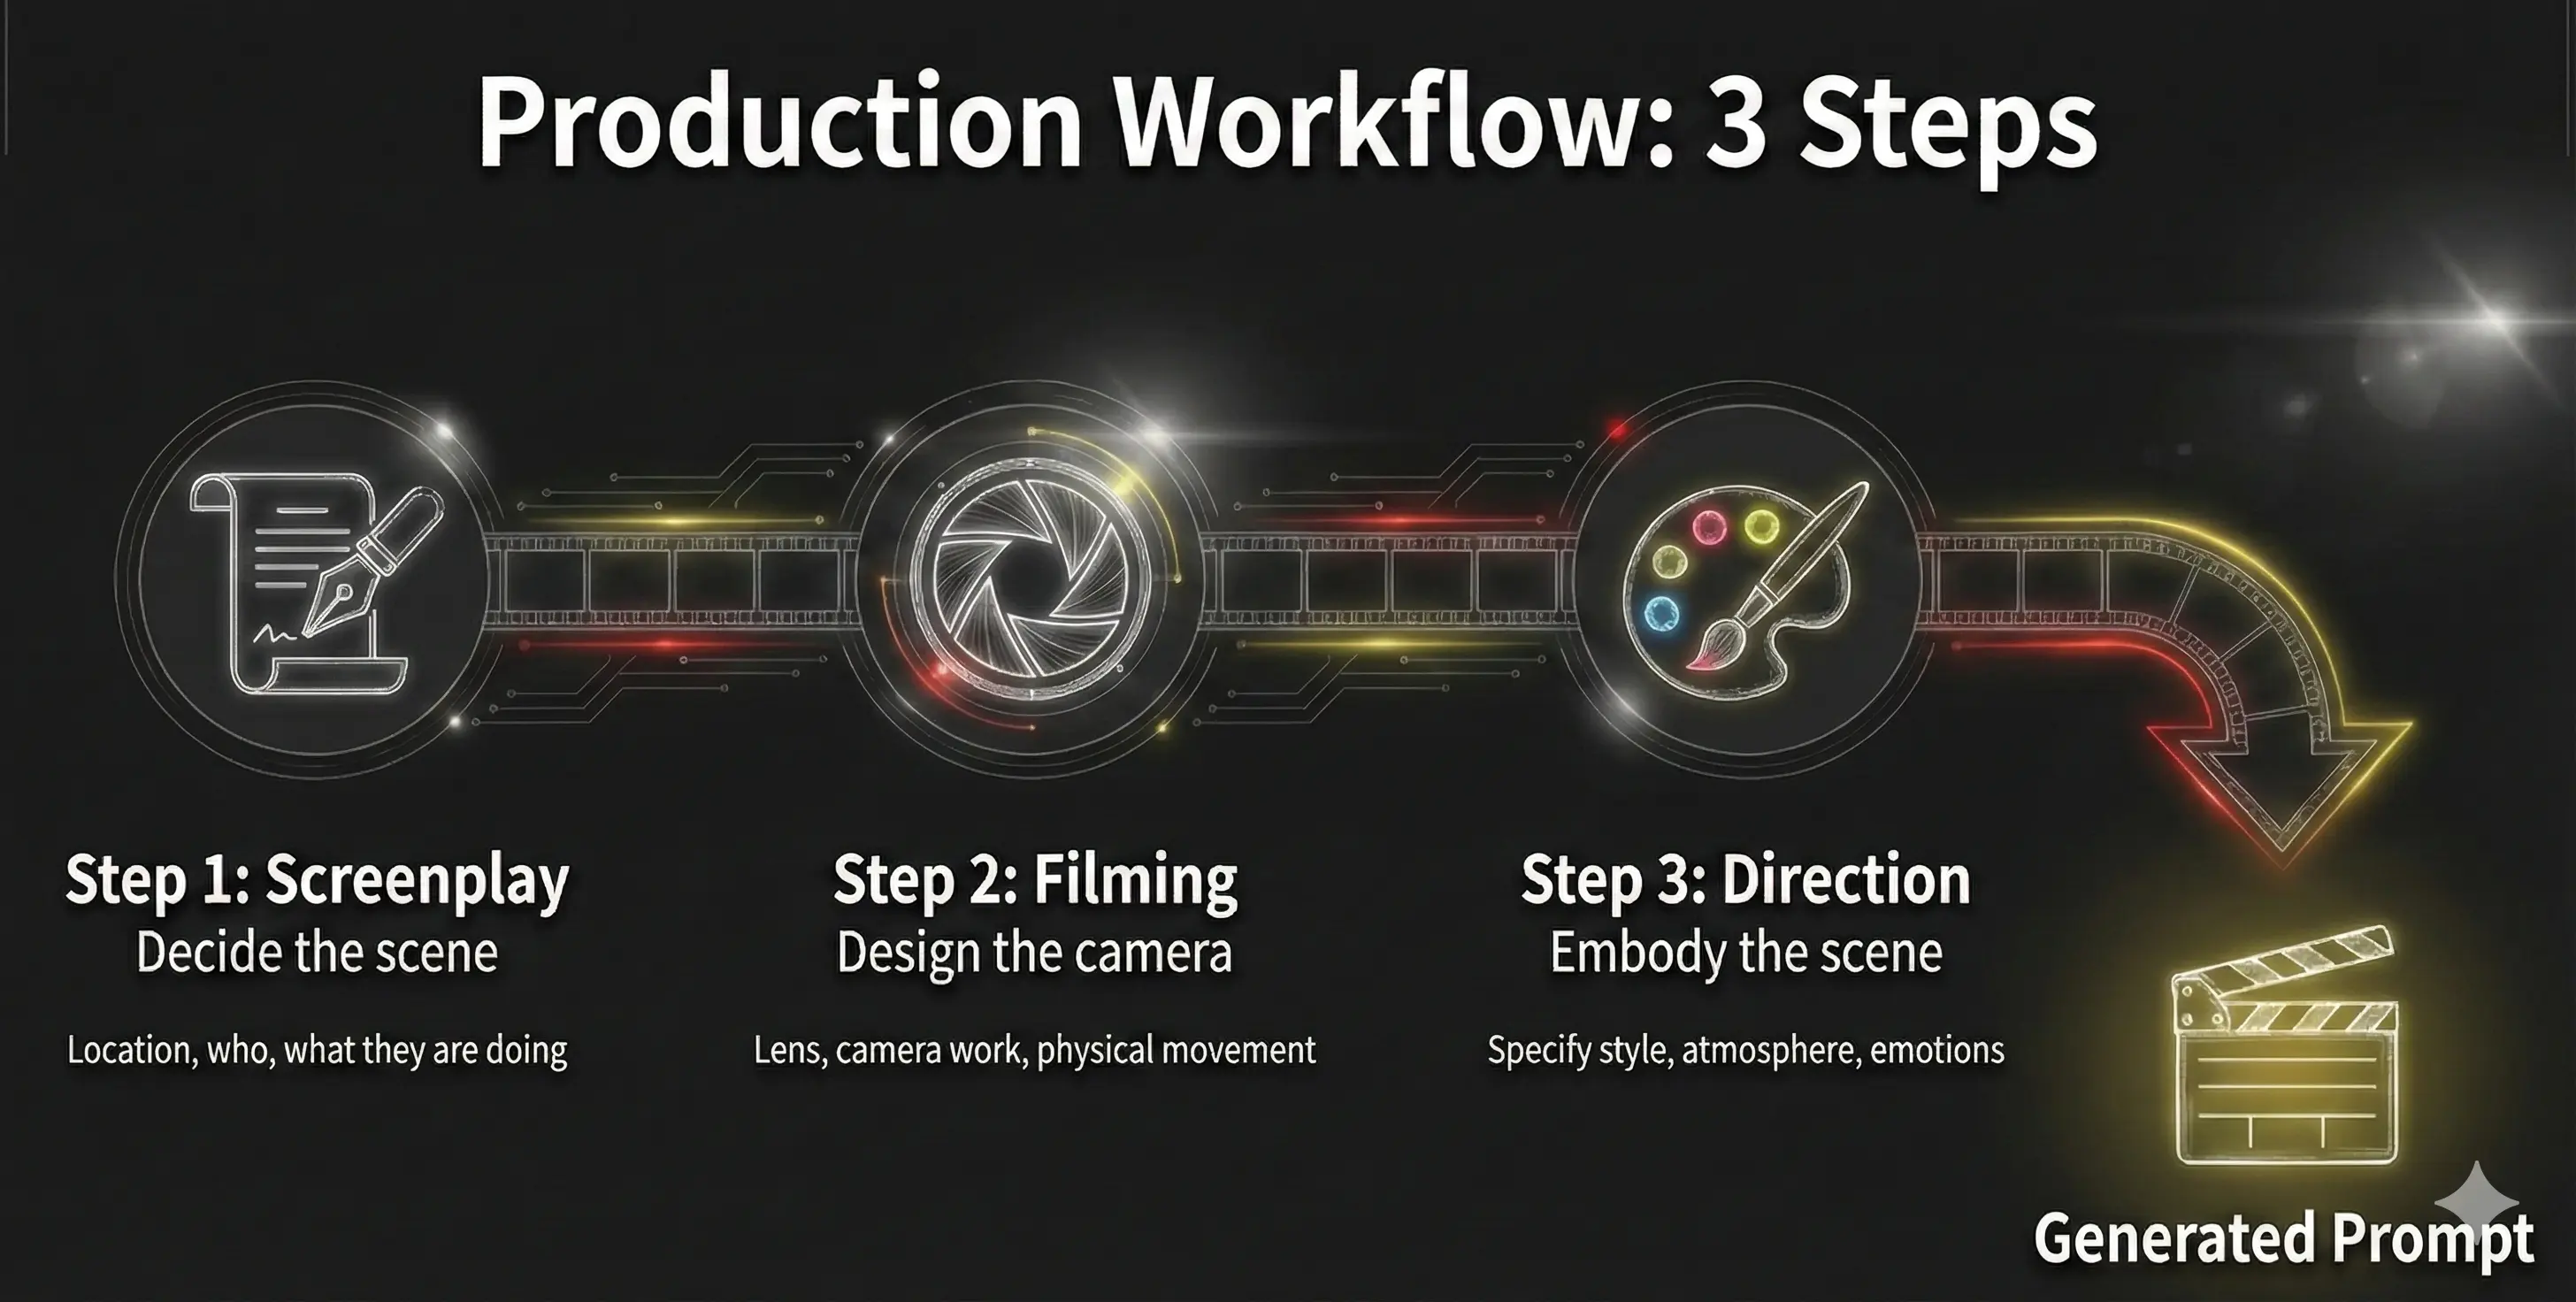
Incorporates cinematic camera work (lens & movement & adjectives) into prompts. Designs video style, cut atmosphere/emotion, background/extras.
movie v2 🙍
In V2, Subject, Dialogue, and optional Narration are separate: on-screen lines vs. voice-over.
- Single-subject cut with dialogue (fill in Subject and Dialogue)
- Single-subject cut without dialogue (leave Dialogue blank)
- Use the Narration field for voice-over (can combine with on-screen dialogue)
+ V1 features
movie v3 👫
For two-person dialogue cuts. Each subject has appearance, on-screen dialogue, and an optional **Action** field (action-only → leave dialogue empty). If both dialogue and action are filled, the built prompt merges them as (verb)line inside the quoted line. Do not duplicate the same beat in both fields. + V1 features
movie v4 🎬
For 3+ people, crowds, and complex blocking. Shotlist-style: up to five subjects (A–E) with appearance, lines, and action, plus shot size, angle, focus, blocking, color palette, and more—alongside V1-style camera, style, and extras.
+ V1-level camera, style, art/extras, narration. Toolbar: right of V3, left of the help (❓) button.
AI cut generation
When generating cuts, the AI reads your script and picks the best V1–V4 version for headcount and blocking in each shot.
V4 Shotlist — Crowds & 3+ people, one cut at a time
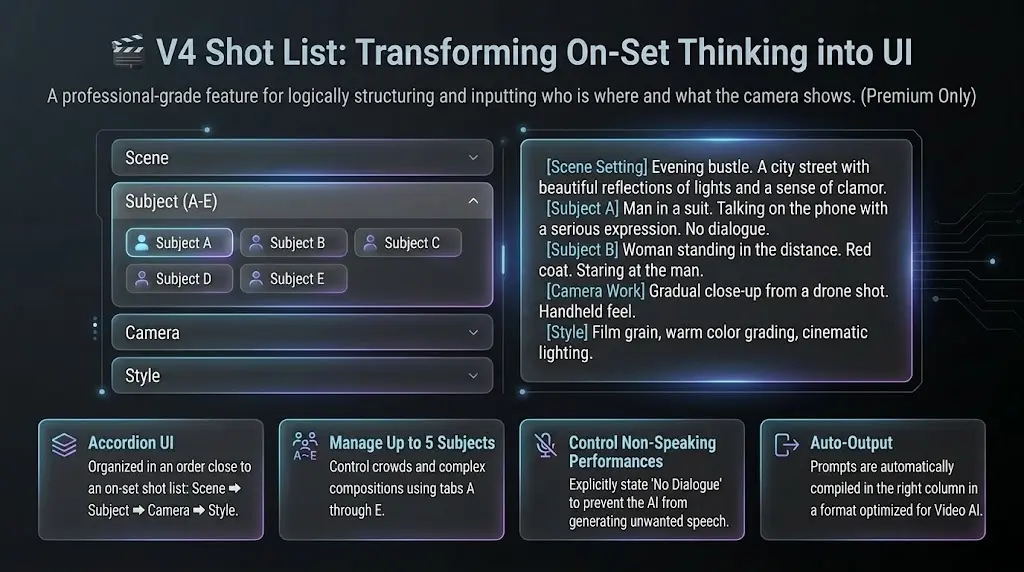
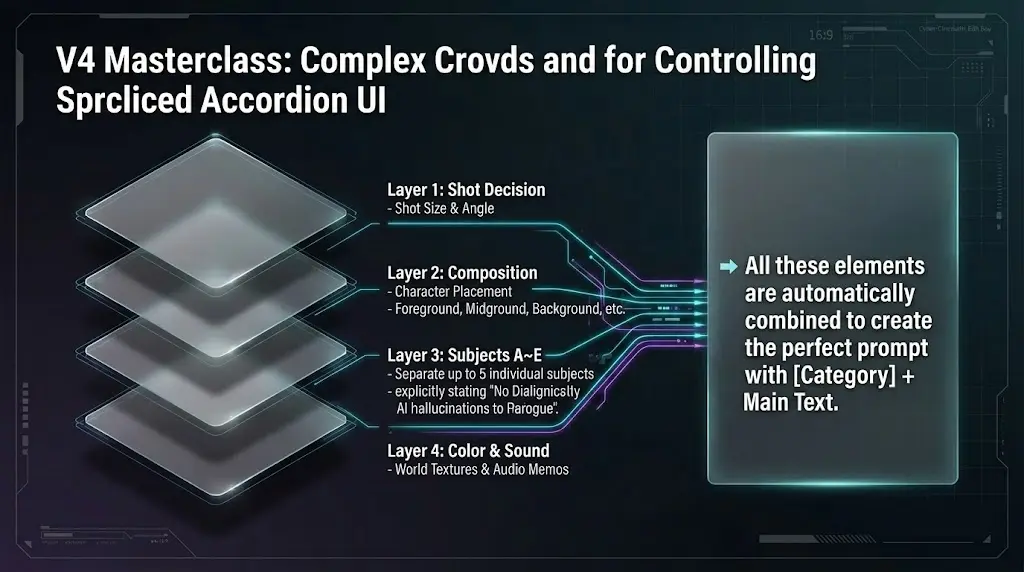
Think **shotlist-style** like on set: enter *who is where* and *what the camera shows* as separate pieces. **More parameters** than V1–V3, so you can use it for **0–2 subject** cuts too—and we recommend it.
Select V4 in the toolbar
In the movie editor toolbar, click **V4** (Shotlist) next to V1–V3. **Premium** feature.
Place a sticky on the timeline
Turn on the timeline and place a sticky where this shot belongs in the script—same as other tools.
Fill accordions and subject tabs
The center column uses **accordions** and tabs: **Scene** → **Subjects (tabs A–E)** → **Camera** (shot size, angle, focus…) → **Style & art**—like a real shotlist. Leave unused subject tabs empty.
Check the built prompt on the right
The right column assembles **【Category】 + text** lines so detailed directions read clearly for video AI.
💡 Good to know
- ▸**No dialogue** is written as “None” / “なし” so silent performances are less likely to get random lines from the generator.
- ▸**Bulk generation** may pick **V4** automatically when the script has three or more people, crowds, or complex blocking.
- ▸Up to **five subjects (A–E)**—great for hallways with three people, parties, or layered blocking.
Confirm that the tool you want is selected, then click anywhere on the timeline to add a sticky note (prompt).
🎬 How to use V1, V2, V3, and V4
🚀 Start Film Production Now!
Now that you've read and understood the documentation, try experiencing film production with Directors Console.